A book cipher is a cipher where the plaintext letters (or words) are encrypted using a book (or other text document) as a kind of lookup table. Sender and receiver of encrypted messages can agree to use any book or other publication available to both of them. A book cipher has a considerable advantage for a spy in enemy territory since it does not raise suspicion (like e.g. a code book). The main strength of a book cipher is the key, because only being in possession of the original “book” allows the decryption.
Famous Examples of Book Ciphers
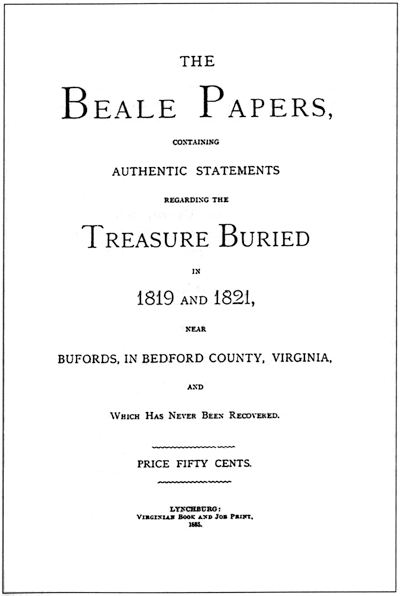
- The most famous book ciphers are probably the “Beale ciphers”
• The Beale ciphers are three encrypted documents
• Only one of the documents has been successfully deciphered (using the United States Declaration of Independence as key)
• The two other messages are still unsolved… (it is unclear, how these were encrypted) - The “Arnold Cipher” was a book cipher used by John André and Benedict Arnold in 1780 during the American Revolutionary War
• The book used as a key to the cipher was either “Commentaries on the Laws of by William Blackstone or Nathan Bailey’s Dictionary
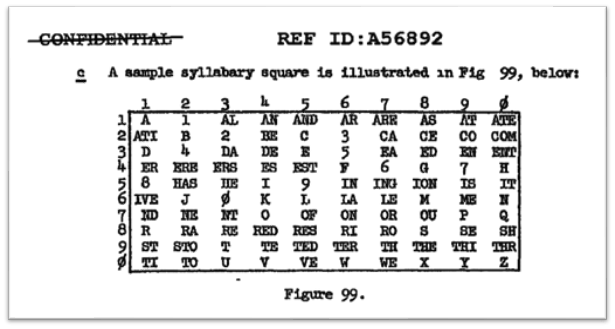
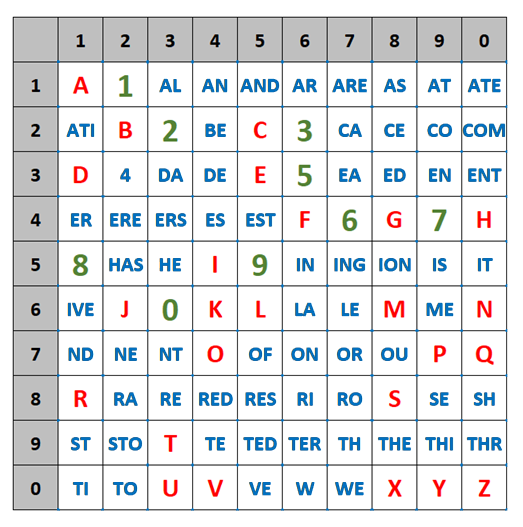
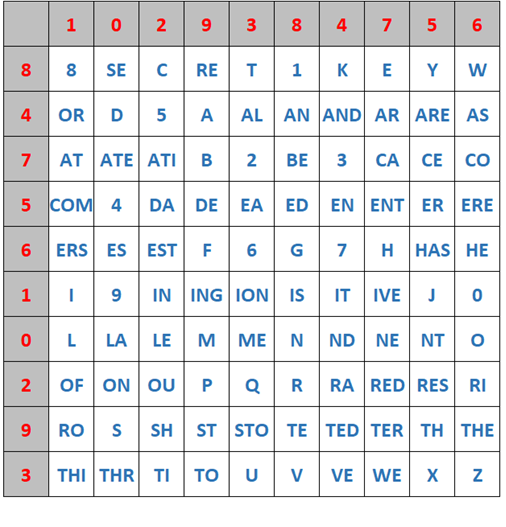
• The cipher consisted of a series of three numbers separated by periods:
page number . Line number . word number - The “Cicada 3301 online puzzle” series also contained book ciphers
The Book Cipher
First, the sender and the receiver have to agree on the (exact) same “book”. They also have to agree on an “encoding scheme”:
1. Encode single letters
2. Encode complete words
Also, they need to know “what” is encoded:
1. Page
2. Line
3. Word
1. Single Letter Scheme:
In the following, we show an example of a book cipher with the “single letter scheme”. It uses this sample text as key:
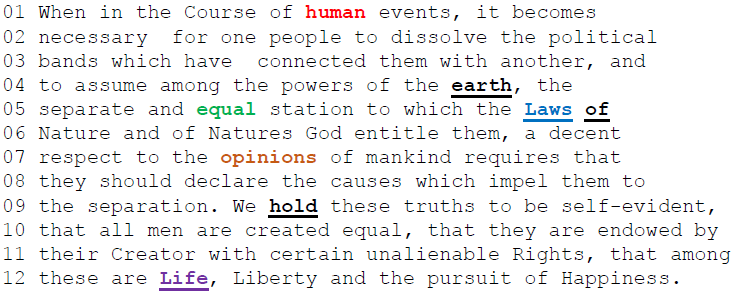
To encrypt a plaintext, take a random word from the “book” above which starts with the plaintext letter you want to encrypt. Then, write the position of the word into the ciphertext. Go on, until you have encrypted the complete plaintext. In the following are two examples, how to encrypt plaintexts:
Example 1 (Write the offset of the word into the ciphertext):
H E L L O W O R L D –> 6 37 100 42 56 72 12 53 42 52
Example 2 (Write the line number and position of the word in the particular line into the ciphertext):
H E L L O W O R L D –> 09.04 04.08 12.03 05.08 05.09 08.06 06.03 07.07 12.03 06.09
Hint: With a real book, we could also prepend the page number.
2. Complete word scheme:
The “complete word scheme” is described in my YouTube video about the book cipher (see below). Also, I explain how to use a book cipher in CrypTool 2.