The British “Typex” Cipher Machine Explained

The Typex is a cipher machine used by the British during World War II. It is, similar to the German Enigma cipher machine, an elector-mechanical rotor encryption machine. In contrast to the Enigma, the Typex was not broken during WWII. The Germans believed that Enigma is unbreakable and since Typex is very similar, they did not even attempt to break the machine.

I recently wrote a new CrypTool 2 component that implements the Typex cipher machine. If you are interested in testing the component (and the machine) yourself, you should download the latest nightly build of CrypTool 2.

History and Usage of the Typex

The Typex machine was used for
a) Encryption of the own communication
b) Deciphering German Enigma messages

It was developed by Wing Commander Oswyn G.W. Lywood, Flight Lieutenant Coulson, Mr. E. W. Smith, and Sergeant Albert Lemon.

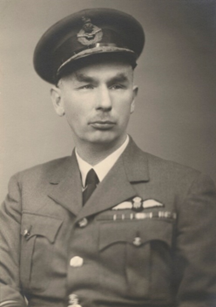
This image here shows Oswyn George William Gifford Lywood; a photo by Walter Stoneman; bromide print, February 1945; NPG x186070 © National Portrait Gallery, London.

There were several different versions of Typex including: Typex Mark I up to Mark VIII, Mark 22 and Mark 23.

A very nice and more detailed overview of the history of Typex can be found here: https://typex.virtualcolossus.co.uk/typex.html

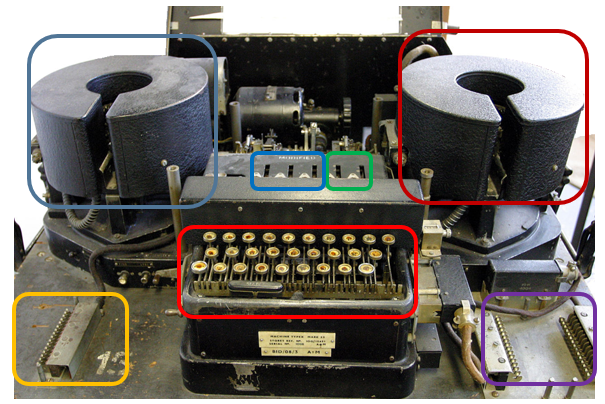
The Typex Components

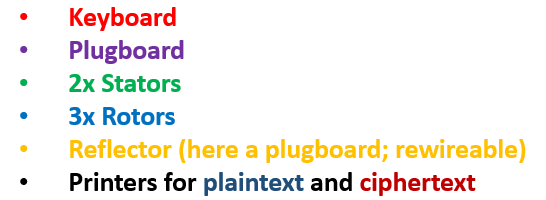
In the following, we have a look at the machine’s components. The Typex machine consists of:

Components of Typex
Typex machine with marked components
Logical overview of Typex components

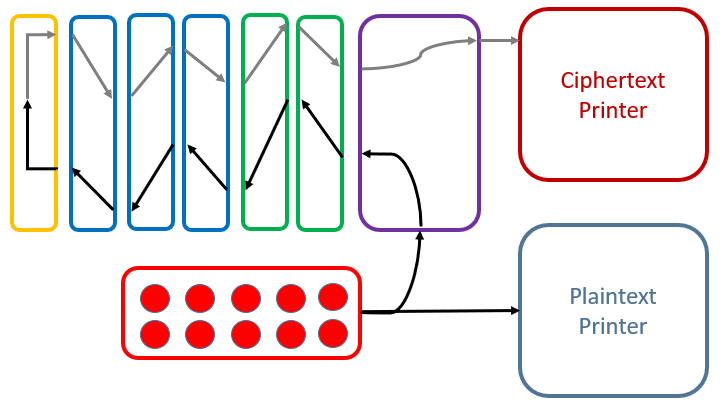
When pressing a key on the keyboard, the plaintext letter is printed by the plaintext printer. Also, current flows through the plugboard, the two stators, the three rotors and is then reflected by the reflector. Then it flows back through the three rotors and the two stators as well as the plugboard. Finally, the ciphertext letter is printed by the ciphertext printer.

Clearly, every time a key is pressed, between one and all three rotors move (Stators of course don’t move). In contrast to Enigma, a Typex rotor moves much more often. This is because the rotors have between 4 and 7 notches, while Enigma rotors had at most two notches.

The Typex Plugboard

The Typex plugboard is the first (and last) component (despite the printers), which current is lead through after a key is pressed on the keyboard. It allows to “plug” letters, creating an initial monoalphabetic substitution.

Typex plugboard

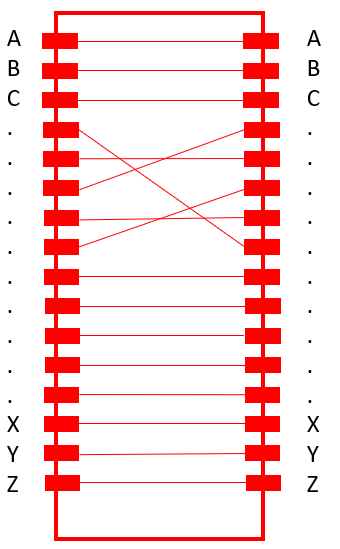
The plugboard is not reciprocal (like the Enigma‘s plugboard. With Enigma, if we have letter X to letter Y, then we would also have letter Y to letter X). It, thus, offers a larger keyspace than Enigma’s plugboard.

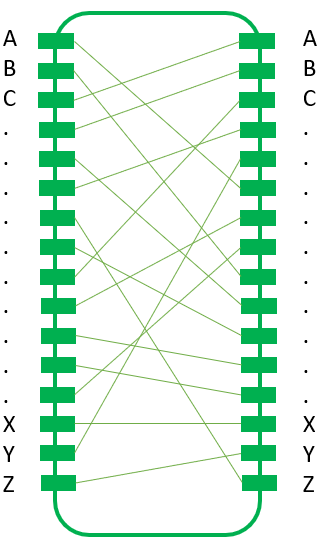
The Typex Rotors/Stators

Typex consists of two stators and three rotors. A rotor has more „notches“ than Enigma rotors (in CrypTool 2’s Typex implementation between 4 and 7). A rotor’s electrical contacts are doubled to improve reliability. Unfortunately, the original rotors are not published and still kept secret, thus, the simulators use no official rotor definitions.
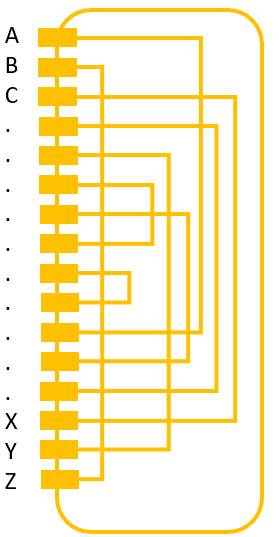
Typex rotor

The Typex Reflector

The Typex reflector “reflects” the current coming from the rotors back through the rotors. In later Typex versions the reflector was replaced by an additional plugboard which allowed to change the reflector’s wiring easily.

Typex reflector

Keyspace Size and Unicity Distance

Since no original rotor definitions are known, the computation of keyspace size and unicity distance is based on the “CyberChef” Typex simulator written and published by GCHQ (see https://gchq.github.io/CyberChef/).

With this implementation, we have to choose 5 rotors (3 actual rotors and 2 stators) from a set of 8 rotors. Since a rotor can be put into the machine in forward or reversed position, they basically doubled the amount of usable rotors to 16. Here, we assume that we can use each rotor as many times as we like in parallel. Thus, the “rotor keyspace size” is:

Typex rotor keyspace size (“CyberChef” version)

We have to set the rotor start positions. We have five rotors (3 actual rotors and 2 stators). Each rotor can be in one of 26 different positions (A-Z). Thus, we have a total “start position keyspace” of:

Typex start position keyspace size

The plugboard is basically a simple monoalphabetic substitution cipher. That means, for the first letter we have 26 different letters to choose from, for the second letter, we have 25 different remaining letters to choose from,…
Thus, the “plugboard keyspace” is:

Typex plugboard keyspace size

To compute the overall keyspace size, we have to multiply all “sub-keyspace” sizes:

Total keyspace size of the Typex (“CyberChef” version)

To compute the unicity distance U, we have to divide the entropy of the keyspace by the redundancy of the (English) language:

Typex unicity distance U (“CyberChef” version)

This means, we need a minimum of 42 letters to be able to obtain a single valid solution when we perform cryptanalysis of a Typex message.

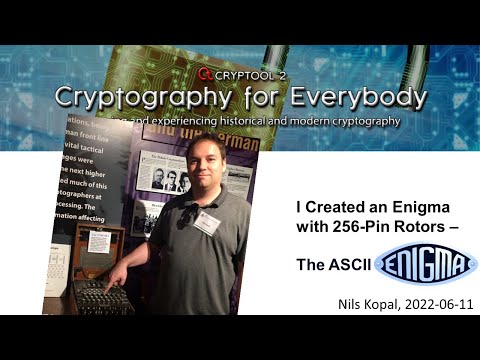
A YouTube Video about Typex and a Web-Based Simulator

I also created a YouTube video about the Typex cipher machine. Here, I discuss the machine as well as its keyspace size and unicity distance. Also, I show how to use the Typex component in CrypTool 2:

The British Typex Cipher Machine Explained

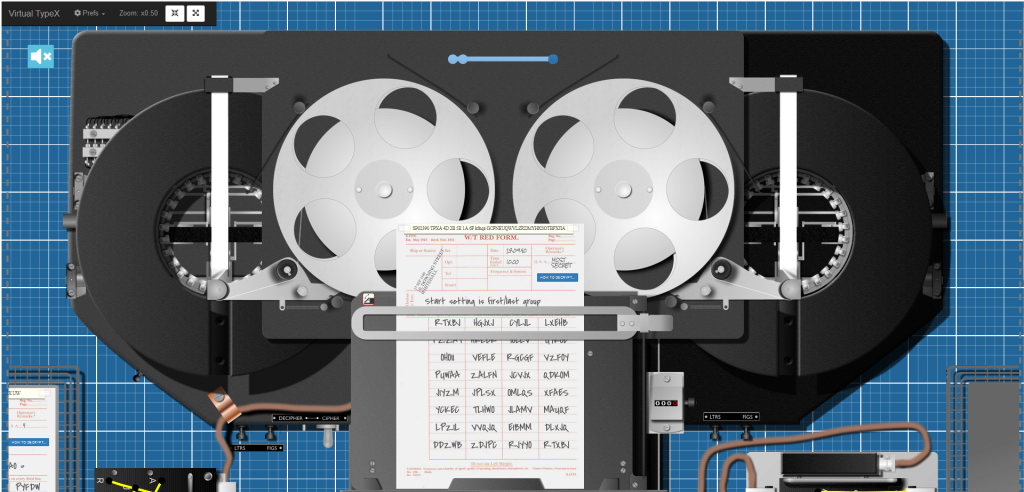
Finally, if you want to “play” with a really nice simulator (and also want to learn much more about the Typex), you should have a look at the “Virtual Typex”: https://typex.virtualcolossus.co.uk/Typex/

The usage of the simulator is also shown in the above linked YouTube video :-).

Screenshot of the “Virtual Typex”

I Deciphered a Radio-Transmitted Enigma Message

On Saturday the 23rd July 2022, the Maritime Radio Historical Society (MRHS) and the Cipher History Museum sent an Enigma-encrypted radio transmission via the KPH stations. I was able to receive the message and decrypt it using CrypTool 2. Message was sent via Morse (CW) frequencies and radioteletype (RTTY) frequencies.

In one of my YouTube videos, I explain how I received the message using KiwiSDR and how the Morse decoding in KiwiSDR and the decryption process in CrypTool 2 worked. I thank Tom Perera from the cryptocollectors group for providing the playbacked parts of the original audio recording of the transmission. Finally, I recorded the wrong audio device, thus, I only had the video recording of what I did.

I Decrypted an Enigma Message Transmitted by Radio

Despite not being the fastest decipherer, I am proud that I received a very nice certificate. I got it after sending the plaintext to the Martitime Radio Historical Society via email:

My certificate for deciphering the Enigma message from the MRHS

If you want to try to decrypt the Enigma message on your own, here is my received and Morse-decoded message (actual ciphertext in bold):
FQ CQ DE KPH KPH KPH CQCQ CQ DE KPH KPH KPH CRYPTO MESSAGE FOLLOWS bt HQTRS FR FOCH 1914Z bt 100 bt BRV LTV bt VCXTY JRVHA NNKMO FGKIG OIPLM KVHVZ WDMIP XWRBX JKDWT KGZZA IWJVN QUTJF HPPWG KEDDQ QFEMT UKMQU IDIGF YUAJB RPPWS IBJCV EI[err][err]E CQ CQ CQ DE KPH KPH KPH CQ CQ CQ DE KPH KPH KPH CRYPTO MESSAGE FOLLOWS bt HQTRS FR FOCH 1914Z bt 100 bt BRV LTV bt VCXTY JRVHA NNKMO FGKIG OIPLM KVHVZ WDMIP XWRBX JKDWT KGZZA IWJVN QUTJF HPPWG KEDDQ QFEMT UKMQU IDIGF YUAJB RPPWS IBJCV E 5IH[err][err][err][err]EN SVAM bt I[err]

You can decrypt it using CrypTool 2 or any Enigma simulator. Here is a screenshot of the Enigma and settings in CrypTool 2:

Enigma set up for decryption of the message in CT2

Some references:

– To visit the MRHS, please go to: https://www.radiomarine.org
– The Cipher History Museum go to: https://cipherhistory.com/
– KiwiSDR you can find here: http://kiwisdr.com

Cryptography for Everybody: The ASCII Enigma – An Enigma Machine with 256-Pin Rotors

Recently, I created the “TextAES”, an AES-like cipher, where each building block of the original AES was replaced by a classical cipher. Of course, I also made a video about that and uploaded it onto my YouTube channel 🙂

After getting some feedback on my corresponding blog article here, I created the ASCII Enigma. An Enigma machine with 256-pin rotors. The basic idea was to create an Enigma machine that resembles the original design, but allows the encryption of more then the standard 26 Latin characters.

Three new Enigmas

In total, I developed three different new Enigmas and programmed these in C#: the Morse Enigma, the Enigma64, and the ASCII Enigma.

The Morse Enigma allows the encryption of more than 26 letters, but it still only uses symbols, that can be sent using Morse code. The main idea was, that this machine could have been built in the 1940s and Morse code was the state-of-the-art transmission media for messages. This Enigma machine has rotors with 38 pins. It allows the encryption of the letters A-Z, digits 0-9, and four special characters ( . , ! ? ).

The next Enima is the Enigma64. It allows the encryption of uppercase letters A-Z, lowercase letters a-z, digits 0-9, and two special characters ( . , ). My idea here is, that the created ciphertexts can still be represented using printable characters. By replacing . and , with / and +, the machine could easily by converted to a “Base64 Enigma”.

The last and most powerful Enigma I created is the ASCII Enigma. It allows the encryption of all 256 ASCII symbols. Since a lot of these are not printable, the resulting ciphertexts should be either converted to Base64, Hex values, or just stored in a binary file.

The C# Code

My C# code does not only allow to create these “fantasy” Enigmas, but also to create original Enigmas. I implemented the Enigma 1 for testing my code. Finally, one can also create Enigmas with only 1 or even 1,000 rotors. It can be easily done using only a few C# statements. Below you see how to create an Enigma 1:

int[] key = new int[] { 0, 1, 2 }; // A B C <--> we work on numbers instead of letters

//create plugboard with three plugs
int[][] plugs = new int[3][];
plugs[0] = new int[] { 0, 1 }; // plug A <-> B
plugs[1] = new int[] { 2, 3 }; // plug C <-> D
plugs[2] = new int[] { 4, 5 }; // plug E <-> F

//create rotors for machine
Rotor rotor1 = new Rotor(MapTextIntoNumberSpace(Enigma1.RotorI, Alphabets.Alphabet26), Enigma1.RotorINotches, 0);
Rotor rotor2 = new Rotor(MapTextIntoNumberSpace(Enigma1.RotorII, Alphabets.Alphabet26), Enigma1.RotorIINotches, 0);
Rotor rotor3 = new Rotor(MapTextIntoNumberSpace(Enigma1.RotorIII, Alphabets.Alphabet26), Enigma1.RotorIIINotches, 0);
Rotor reflector = new Rotor(MapTextIntoNumberSpace(Enigma1.UKWA, Alphabets.Alphabet26), null, 0);

//create machine
RotorMachine enigma1 = new RotorMachine(new Rotor[] { rotor1, rotor2, rotor3 }, reflector, new Plugboard(Alphabets.Alphabet26, plugs), Alphabets.Alphabet26);

//reset machine key
enigma1.Key = key;

//plaintext:
string text = "HELLOXWORLDXTHISXISXAXTESTXTEXT";
Console.WriteLine(text);

//encrypt/decrypt and print all to console
int[] plaintext = MapTextIntoNumberSpace(text, Alphabets.Alphabet26);
int[] ciphertext = enigma1.CryptText(plaintext);
Console.WriteLine(MapNumbersIntoTextSpace(ciphertext, Alphabets.Alphabet26));

//reset machine key
enigma1.Key = key;

int[] decrypted = enigma1.CryptText(ciphertext);
Console.WriteLine(MapNumbersIntoTextSpace(decrypted, Alphabets.Alphabet26));

Here, we create an Enigma 1 with three rotors (I, II, III), a plugboard, and the reflector UKWA. My implementation does not take the “rings” into account since these are cryptographically irrelevant. And it eased the code :-). If you want to have an implemention of the Enigma with rings, have a look at CrypTool 2.

My YouTube Video and the Source Code

Of couse, I also made a video about the ASCII Enigma:

I Created an Enigma Machine with 256-Pin Rotors – The ASCII Enigma

If you are interested in getting your hands on the source code, I created a GitHub project where you can get it from: https://github.com/n1k0m0/ASCIIEnigma